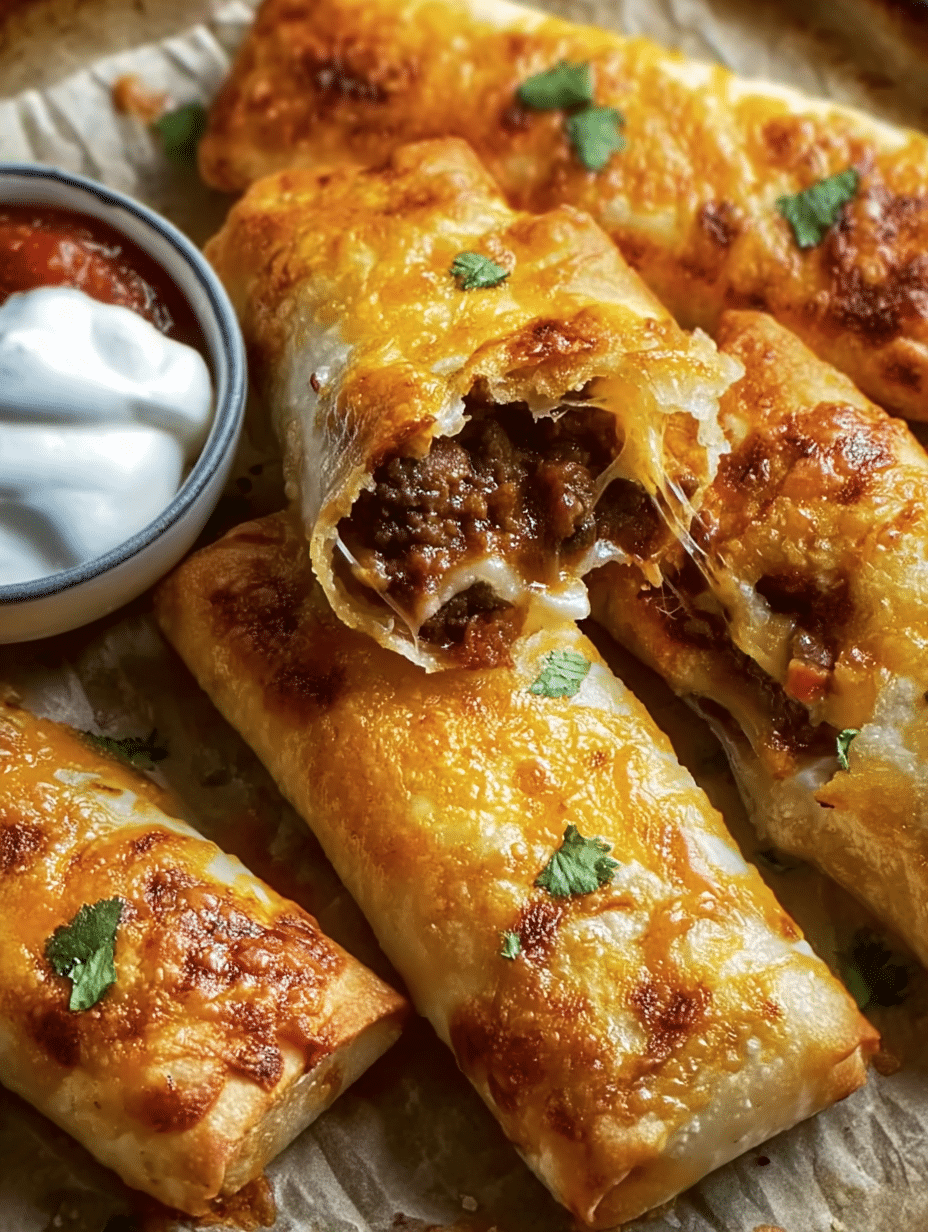
Introduction to Cheesy Taco Sticks
Hey there, fellow food lovers! If you’re anything like me, you know that life can get pretty hectic. That’s why I’m excited to share my recipe for Cheesy Taco Sticks. These delightful snacks are not only easy to whip up, but they also pack a punch of flavor that will impress your family and friends. Whether you’re hosting a game night or just need a quick meal after a long day, these cheesy wonders are the perfect solution. Trust me, once you try them, they’ll become a go-to in your kitchen!
Why You’ll Love This Cheesy Taco Sticks
Let’s be honest—who doesn’t love a snack that’s both cheesy and packed with flavor? These Cheesy Taco Sticks are a breeze to make, taking just 30 minutes from start to finish. They’re perfect for busy weeknights or spontaneous gatherings. Plus, the combination of savory taco filling and gooey cheese is simply irresistible. You’ll find yourself reaching for seconds, and maybe even thirds!
Ingredients for Cheesy Taco Sticks
Gathering the right ingredients is the first step to creating these mouthwatering Cheesy Taco Sticks. Here’s what you’ll need:
- Ground beef (or turkey): This is the heart of your filling, providing that savory flavor. You can also use plant-based meat for a vegetarian option.
- Taco seasoning: A packet of this magical mix brings all the classic taco flavors to life. Feel free to make your own if you’re feeling adventurous!
- Salsa: This adds a zesty kick and moisture to the filling. Choose your favorite brand or make a fresh batch at home.
- Refrigerated pizza dough (or crescent roll sheet): This is the cozy blanket that wraps around your filling. It’s super convenient and saves time, but homemade dough works too!
- Shredded cheese: The gooey goodness that ties everything together. Cheddar, Mexican blend, or mozzarella are all great choices.
- Egg (for egg wash): This gives your Cheesy Taco Sticks a beautiful golden finish. You can skip it if you prefer a dairy-free option.
- Optional dips: Sour cream, guacamole, or extra salsa make perfect companions for these sticks. They add an extra layer of flavor and fun!
For exact measurements, check the bottom of the article where you can find everything listed for easy printing. Happy cooking!
How to Make Cheesy Taco Sticks
Step 1: Prepare the Taco Filling
Let’s kick things off by cooking the ground beef in a skillet over medium heat. As it sizzles, the aroma will make your mouth water! Once it’s browned, drain any excess fat. Now, sprinkle in the taco seasoning and pour in the water. Stir it all together and let it simmer for about 3–4 minutes until it thickens. Finally, mix in the salsa for that extra zing. Set the filling aside to cool slightly while you prep the dough. Trust me, this filling is the star of your Cheesy Taco Sticks!
Step 2: Preheat and Roll Out Dough
Next up, preheat your oven to 425°F (220°C). This is the perfect temperature for achieving that golden-brown crust. While the oven warms up, roll out your pizza dough on a lightly floured surface. Aim for a rectangle shape, about ¼ inch thick. Don’t worry if it’s not perfect; it’s all about the deliciousness inside! Once rolled out, cut the dough into 8 equal sections. You’re one step closer to cheesy goodness!
Step 3: Assemble the Taco Sticks
Now comes the fun part—assembling your Cheesy Taco Sticks! Take a spoonful of the taco filling and place it in the center of each dough section. Don’t be shy; a generous amount is key! Next, sprinkle a handful of shredded cheese on top. This is where the magic happens! Fold the dough over the filling, pinching the seams tightly to seal them. Shape them into a breadstick form, ensuring no filling escapes. Your kitchen will soon be filled with the delightful scent of tacos!
Step 4: Bake to Perfection
Time to bake! Arrange your assembled sticks on a parchment-lined baking sheet. Brush the tops with the beaten egg for that beautiful golden finish. If you’re feeling extra cheesy, sprinkle some more cheese on top. Pop them in the oven and bake for 12–15 minutes. Keep an eye on them; you want them golden brown and the cheese melted. Once done, let them cool slightly before serving. Get ready for a cheesy taco experience like no other!
Tips for Success
- Make sure to drain the ground beef well to avoid soggy sticks.
- Don’t overfill the dough; a spoonful of filling is just right!
- Experiment with different cheeses for unique flavors.
- For a crispy texture, bake on a preheated baking sheet.
- Let the sticks cool for a few minutes before serving to avoid burns.
Equipment Needed
- Skillet: A non-stick skillet works best, but any frying pan will do.
- Rolling pin: If you don’t have one, a wine bottle can serve as a great alternative!
- Baking sheet: A standard baking sheet lined with parchment paper is ideal.
- Mixing spoon: Use a wooden spoon or spatula for easy mixing.
- Pastry brush: If you don’t have one, a clean paper towel can work for the egg wash.
Variations
- Spicy Cheesy Taco Sticks: Add diced jalapeños or a splash of hot sauce to the taco filling for an extra kick.
- Vegetarian Option: Substitute the ground beef with black beans or lentils for a hearty, meat-free version.
- Cheese Lovers: Mix different types of cheese, like pepper jack or feta, for a unique flavor profile.
- Gluten-Free: Use gluten-free pizza dough or corn tortillas to make these Cheesy Taco Sticks suitable for gluten-sensitive diets.
- Breakfast Taco Sticks: Incorporate scrambled eggs and breakfast sausage for a delicious morning twist!
Serving Suggestions
- Pair your Cheesy Taco Sticks with a fresh side salad for a balanced meal.
- Serve with a variety of dips like sour cream, guacamole, or salsa for added flavor.
- For drinks, consider a refreshing iced tea or a zesty margarita.
- Garnish with chopped cilantro or green onions for a pop of color.
FAQs about Cheesy Taco Sticks
Can I make Cheesy Taco Sticks ahead of time?
Absolutely! You can prepare the filling and assemble the Cheesy Taco Sticks ahead of time. Just freeze them before baking. When you’re ready to enjoy, bake them straight from the freezer, adding a few extra minutes to the cooking time.
What can I use instead of ground beef?
If ground beef isn’t your thing, don’t worry! You can easily substitute it with ground turkey, chicken, or even plant-based meat for a vegetarian option. The flavors will still shine through!
How do I store leftovers?
Leftover Cheesy Taco Sticks can be stored in an airtight container in the fridge for up to three days. Just reheat them in the oven for a few minutes to regain that crispy texture.
Can I use homemade dough instead of refrigerated dough?
Of course! If you’re feeling adventurous, homemade dough can add a personal touch to your Cheesy Taco Sticks. Just make sure it’s rolled out thin enough to hold the filling without breaking.
What dips pair well with Cheesy Taco Sticks?
These Cheesy Taco Sticks are fantastic with a variety of dips! Sour cream, guacamole, and salsa are classic choices. You can also try a spicy ranch or a creamy avocado dip for something different!
Final Thoughts
Making Cheesy Taco Sticks is more than just cooking; it’s about creating joyful moments in the kitchen. The aroma of sizzling beef and melting cheese fills the air, inviting everyone to gather around. Whether it’s a cozy family dinner or a lively game night, these cheesy delights bring smiles and satisfaction. Plus, they’re so easy to make that even the busiest of days can accommodate them. So, roll up your sleeves, embrace the mess, and enjoy the deliciousness that comes from your own hands. Trust me, these Cheesy Taco Sticks will become a cherished favorite in your home!
Print
Cheesy Taco Sticks: Easy Recipe for Delicious Snacks!
- Total Time: 30 minutes
- Yield: 8 servings 1x
- Diet: Low Calorie
Description
Cheesy Taco Sticks are a delicious and easy-to-make snack that combines the flavors of tacos with cheesy goodness, perfect for parties or a quick meal.
Ingredients
- 1 lb (450 g) ground beef (or turkey)
- 1 packet taco seasoning + ⅓ cup water
- ½ cup salsa
- 1 tube refrigerated pizza dough (or crescent roll sheet)
- 2 cups shredded cheese (cheddar, Mexican blend, or mozzarella)
- 1 egg (beaten, for egg wash)
- Optional: sour cream, guacamole, or extra salsa for dipping
Instructions
- In a skillet, cook ground beef over medium heat until browned. Drain excess fat. Stir in taco seasoning and water. Simmer until thickened, about 3–4 minutes. Stir in salsa and let cool slightly.
- Preheat oven to 425°F (220°C). Roll out pizza dough on a lightly floured surface into a rectangle. Cut into 8 equal sections.
- Place a spoonful of taco mixture in the center of each dough section. Sprinkle generously with shredded cheese. Fold dough over filling, pinching seams tightly to seal (like a breadstick shape).
- Arrange on a parchment-lined baking sheet. Brush tops with beaten egg. Sprinkle extra cheese on top, if desired. Bake for 12–15 minutes, or until golden brown and cheese is melted.
- Let cool slightly before serving. Enjoy with sour cream, guacamole, or extra salsa for dipping.
Notes
- For a spicier kick, add jalapeños to the meat mixture.
- These can be made ahead of time and frozen before baking.
- Experiment with different types of cheese for varied flavors.
- Prep Time: 15 minutes
- Cook Time: 15 minutes
- Category: Snack
- Method: Baking
- Cuisine: Mexican
Nutrition
- Serving Size: 1 stick
- Calories: 250
- Sugar: 2g
- Sodium: 500mg
- Fat: 15g
- Saturated Fat: 7g
- Unsaturated Fat: 5g
- Trans Fat: 0g
- Carbohydrates: 20g
- Fiber: 1g
- Protein: 12g
- Cholesterol: 50mg


