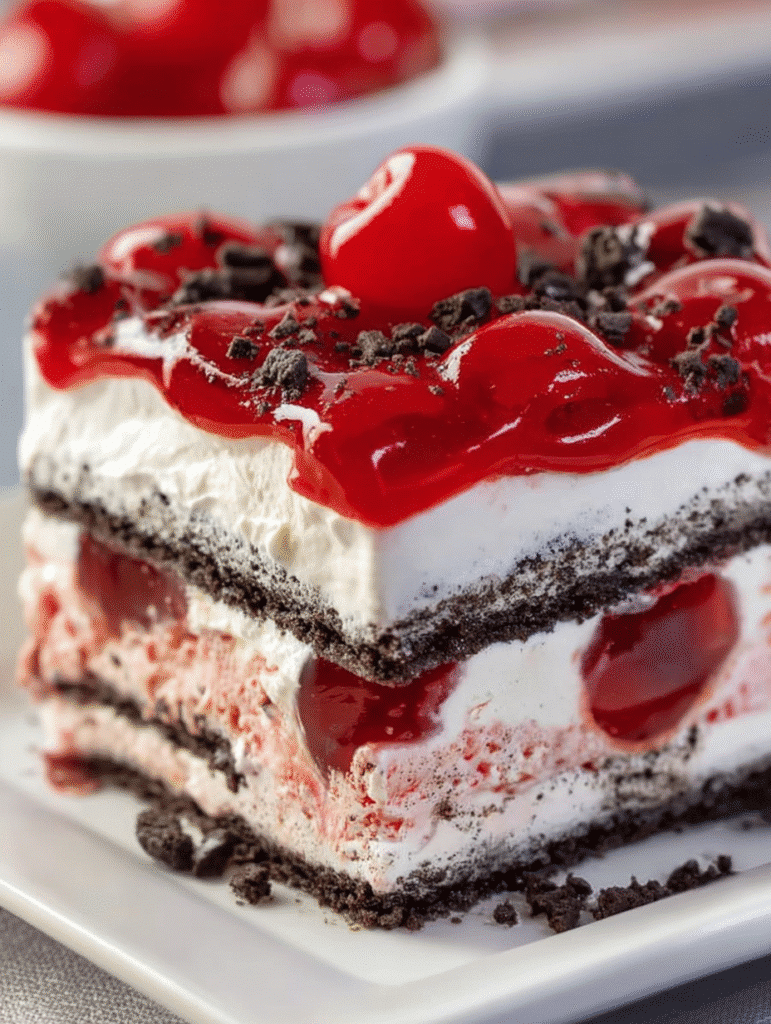
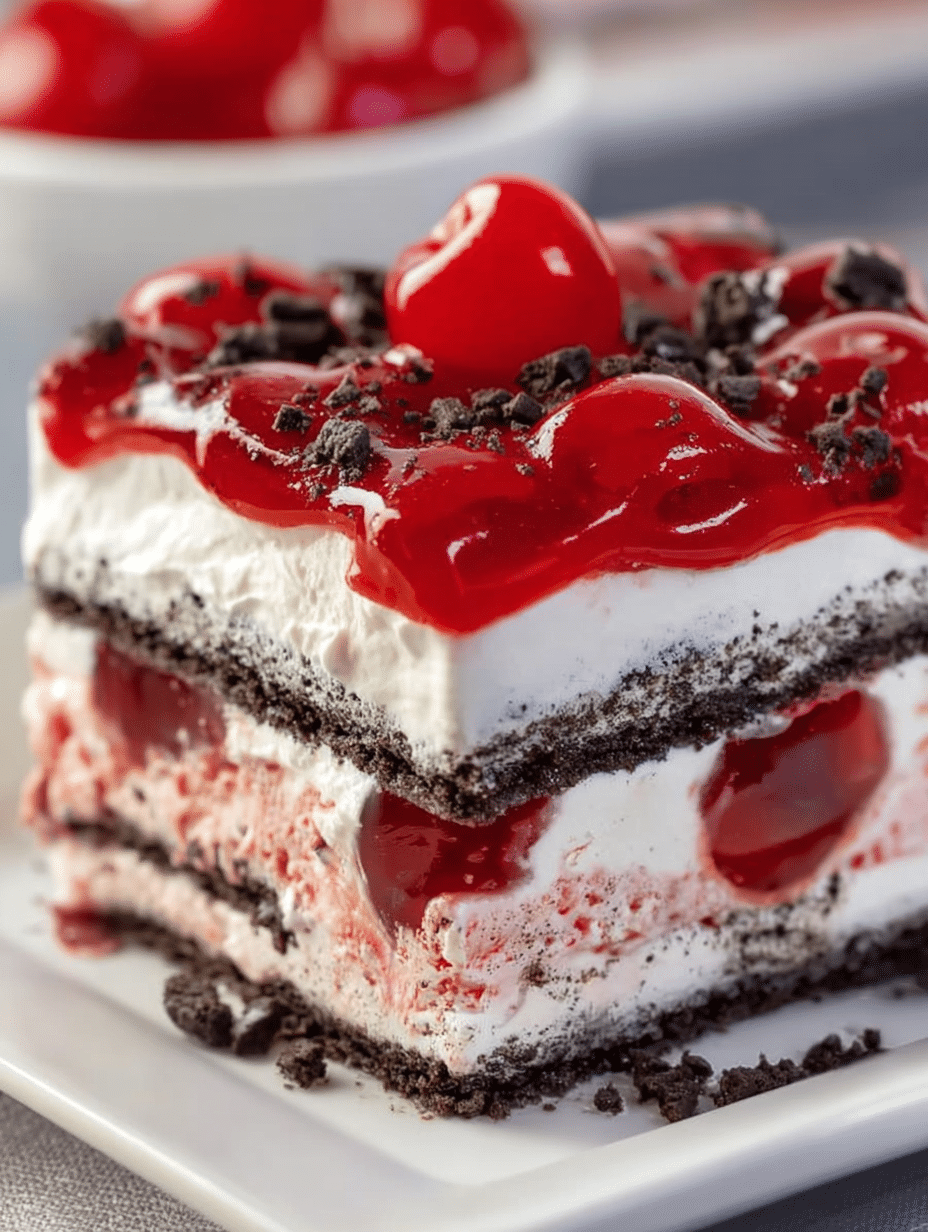
Introduction to Cherry Oreo Icebox Cake
Hey there, fellow dessert lovers! If you’re looking for a sweet escape that’s as easy as pie, let me introduce you to my Cherry Oreo Icebox Cake. This delightful treat is perfect for those busy days when you want to impress your family or friends without spending hours in the kitchen. With its creamy layers and a burst of cherry goodness, it’s a dessert that brings smiles all around. Trust me, once you try this no-bake wonder, it’ll become your go-to recipe for any occasion!
Why You’ll Love This Cherry Oreo Icebox Cake
This Cherry Oreo Icebox Cake is a dream come true for anyone who loves dessert but hates the hassle. It’s incredibly easy to whip up, requiring no baking at all! Just layer, chill, and serve. The combination of rich Oreo cookies and creamy filling topped with sweet cherries creates a flavor explosion that’s hard to resist. Plus, it’s perfect for gatherings, making you the star of the show without breaking a sweat!
Ingredients for Cherry Oreo Icebox Cake
Let’s gather our ingredients for this Cherry Oreo Icebox Cake! Each component plays a vital role in creating that delightful flavor and texture. Here’s what you’ll need:
- Oreo cookies: The star of the show! These chocolatey delights form the base and add a rich flavor.
- Butter: Melted butter helps bind the crushed Oreos together, creating a sturdy crust.
- Heavy cream: This is what makes our filling light and fluffy. Make sure it’s well-chilled for the best results!
- Cream cheese: I love using Philadelphia cream cheese for its smooth texture and tangy flavor, which balances the sweetness.
- Powdered sugar: This sweetener dissolves easily, giving our filling that perfect sweetness without any graininess.
- Vanilla extract: A splash of vanilla adds depth and enhances the overall flavor of the cake.
- Cherry pie filling: This luscious topping brings a burst of fruity goodness. You can also use fresh cherries if you prefer!
- Fresh cherries (optional): For a pop of color and freshness, these make a lovely garnish on top.
For exact measurements, check the bottom of the article where you can find everything listed for easy printing. Now, let’s get ready to create this delicious masterpiece!
How to Make Cherry Oreo Icebox Cake
Now that we have our ingredients ready, let’s dive into the fun part—making this Cherry Oreo Icebox Cake! Follow these simple steps, and you’ll have a delicious dessert that’s sure to impress.
Step 1: Prepare the Oreo Crust
First things first, let’s create that irresistible Oreo crust. Grab your Oreo cookies and toss them into a food processor. Pulse them until they turn into fine crumbs. It’s like turning chocolate dreams into dust!
Next, melt your butter in the microwave. Once it’s nice and gooey, pour it over the Oreo crumbs. Mix them together until everything is well combined. The mixture should resemble wet sand.
Now, take a square baking dish (20×20 cm works perfectly) and press the Oreo mixture firmly into the bottom. Use the back of a measuring cup or your hands to create an even layer. This crust is the foundation of our Cherry Oreo Icebox Cake, so make it sturdy!
Step 2: Make the Cream Filling
With the crust ready, it’s time to whip up the creamy filling. Start by pouring your chilled heavy cream into a mixing bowl. Using an electric mixer, whip it until soft peaks form. It should be light and fluffy, like a cloud on a sunny day!
In another bowl, beat the cream cheese, powdered sugar, and vanilla extract together until smooth. This mixture should be creamy and luscious. Now, gently fold the whipped cream into the cream cheese mixture. Be careful not to deflate the whipped cream; we want that airy texture!
Step 3: Layer the Cake
Now comes the fun part—layering! Start by spreading a generous layer of the cream filling over the Oreo crust. Use a spatula to smooth it out evenly.
Next, spoon a layer of cherry pie filling over the cream. The vibrant red cherries will add a pop of color and flavor. Repeat this process: another layer of cream, followed by more cherries. You can do this until you run out of ingredients, but I usually aim for two layers of each.
Finally, sprinkle the reserved Oreo crumbs on top for that extra crunch. It’s like a cherry on top, but better!
Step 4: Chill the Cake
Now, it’s time to let our Cherry Oreo Icebox Cake chill. Cover the dish with plastic wrap and pop it in the refrigerator. This step is crucial! Chilling allows the flavors to meld together and the cake to set properly.
For the best results, let it chill for at least 4 hours, or even overnight if you can wait. Trust me, the anticipation will be worth it when you take that first bite!
Tips for Success
- Use double-stuffed Oreos for an extra creamy crust.
- Ensure your heavy cream is very cold for better whipping.
- Don’t rush the chilling process; it’s key for the best texture.
- Feel free to mix in some crushed nuts for added crunch.
- For a twist, try using different pie fillings like blueberry or strawberry!
Equipment Needed
- Food processor: Essential for crushing Oreos. A zip-top bag and rolling pin work too!
- Mixing bowls: Use two medium bowls for mixing the cream and cheese. Any size will do.
- Electric mixer: A hand mixer is perfect for whipping cream. A whisk can work, but it’ll take longer.
- Baking dish: A 20×20 cm square dish is ideal. Any similar-sized dish will work.
Variations
- Fruit Swap: Try using different pie fillings like blueberry, strawberry, or peach for a fruity twist.
- Chocolate Lovers: Add a layer of chocolate pudding between the cream and cherry layers for an extra chocolatey delight.
- Nutty Crunch: Mix in some chopped nuts, like pecans or walnuts, into the cream filling for added texture.
- Gluten-Free Option: Use gluten-free Oreo cookies to make this dessert suitable for those with gluten sensitivities.
- Vegan Version: Substitute the cream cheese with a vegan cream cheese alternative and use coconut cream instead of heavy cream.
Serving Suggestions
- Pair with a scoop of vanilla ice cream for a delightful contrast.
- Serve alongside fresh fruit, like strawberries or raspberries, for a refreshing touch.
- Drizzle chocolate sauce over the top for an indulgent finish.
- Garnish with mint leaves for a pop of color and freshness.

FAQs about Cherry Oreo Icebox Cake
As I’ve shared my love for this Cherry Oreo Icebox Cake, I know you might have some questions. Here are a few common ones that pop up, along with my answers to help you out!
Can I make Cherry Oreo Icebox Cake ahead of time?
Absolutely! In fact, making it a day in advance enhances the flavors. Just keep it covered in the fridge until you’re ready to serve.
What can I substitute for the cherry pie filling?
If cherries aren’t your thing, feel free to swap it out for other pie fillings like blueberry or strawberry. The possibilities are endless!
How long does this dessert last in the fridge?
This Cherry Oreo Icebox Cake can be stored in the refrigerator for about 2-3 days. Just make sure it’s covered to keep it fresh!
Can I freeze the Cherry Oreo Icebox Cake?
Yes, you can freeze it! Just wrap it tightly in plastic wrap and foil. It should last for about a month. Thaw it in the fridge before serving.
Is this dessert suitable for vegetarians?
Yes! This Cherry Oreo Icebox Cake is vegetarian-friendly, making it a great option for gatherings with various dietary preferences.
Final Thoughts
Creating this Cherry Oreo Icebox Cake is more than just whipping up a dessert; it’s about sharing joy and deliciousness with those you love. Each layer tells a story, from the crunchy Oreo crust to the creamy filling and the sweet cherry topping. It’s a treat that brings smiles and sparks conversations around the table. Whether it’s a family gathering or a cozy night in, this cake is sure to be a hit. So, roll up your sleeves, gather your ingredients, and let the magic happen. Trust me, every bite will be worth the wait!
Print
Cherry Oreo Icebox Cake: Indulge in a Quick Delight!
- Total Time: 4 heures 30 minutes
- Yield: 8 portions 1x
- Diet: Vegetarian
Description
A delicious and easy-to-make Cherry Oreo Icebox Cake that combines the rich flavors of Oreo cookies and creamy filling with a delightful cherry topping.
Ingredients
- 2 paquets de biscuits Oreo (environ 450 g)
- 100 g de beurre fondu
- 500 ml de crème liquide entière bien froide
- 250 g de fromage frais type Philadelphia
- 100 g de sucre glace
- 1 c. à café d’extrait de vanille
- 1 boîte (500 g) de garniture aux cerises (cherry pie filling)
- Quelques cerises fraîches pour la déco (optionnel)
Instructions
- Mixer les Oreos pour obtenir des miettes fines.
- Mettre de côté ½ tasse pour la décoration.
- Mélanger le reste avec le beurre fondu.
- Presser ce mélange au fond d’un moule carré (20×20 cm).
- Fouetter la crème liquide froide en chantilly ferme.
- Dans un autre bol, battre le fromage frais avec le sucre glace et la vanille.
- Incorporer délicatement la chantilly au mélange de fromage frais.
- Étaler une couche de crème sur la base Oreo.
- Ajouter une couche de garniture aux cerises.
- Répéter avec une autre couche de crème, puis une autre de cerises.
- Saupoudrer du reste de miettes d’Oreo par-dessus.
- Réfrigérer au moins 4 heures (ou toute une nuit pour un résultat parfait).
- Garnir de cerises fraîches sur le dessus juste avant de servir.
Notes
- Pour un goût encore plus riche, utilisez des Oreos double crème.
- Vous pouvez remplacer la garniture aux cerises par d’autres fruits selon vos préférences.
- Ce dessert se conserve bien au réfrigérateur pendant 2-3 jours.
- Prep Time: 30 minutes
- Cook Time: 0 minutes
- Category: Dessert
- Method: No-bake
- Cuisine: American
Nutrition
- Serving Size: 1 slice
- Calories: 350
- Sugar: 25g
- Sodium: 150mg
- Fat: 20g
- Saturated Fat: 10g
- Unsaturated Fat: 8g
- Trans Fat: 0g
- Carbohydrates: 40g
- Fiber: 2g
- Protein: 4g
- Cholesterol: 30mg


