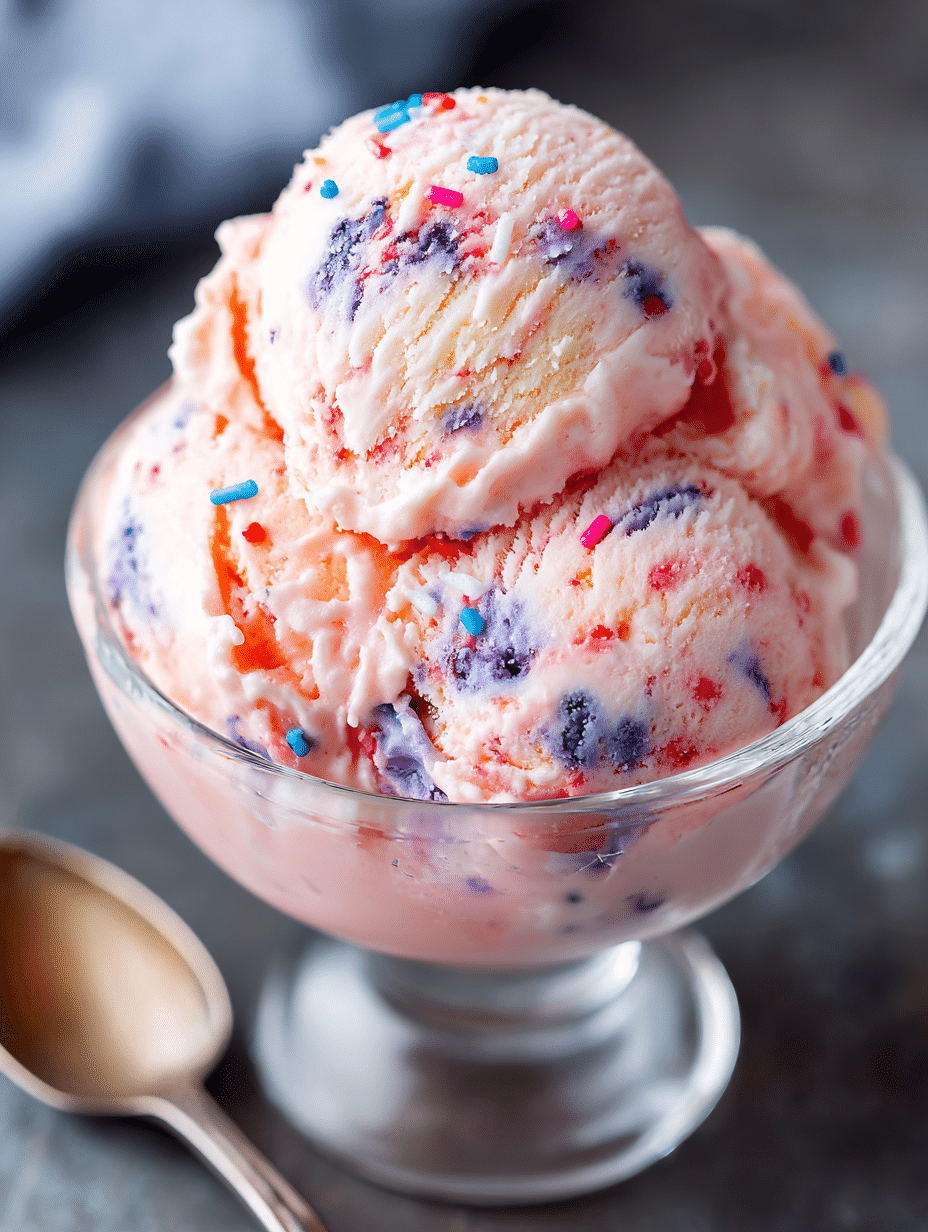
Introduction to Dragonfruit Bubblegum Blast Ice Cream
Hey there, fellow ice cream lovers! If you’re looking for a delightful treat that’s as fun to make as it is to eat, then you’ve stumbled upon the perfect recipe: Dragonfruit Bubblegum Blast Ice Cream. This creamy concoction is not just a feast for the taste buds but also a visual delight with its vibrant colors. Whether you’re trying to impress your friends at a summer gathering or simply want to indulge in a sweet escape after a long day, this ice cream is your go-to solution. Trust me, it’s a magical experience that will leave everyone smiling!
Why You’ll Love This Dragonfruit Bubblegum Blast Ice Cream
This Dragonfruit Bubblegum Blast Ice Cream is a dream come true for busy home cooks like me. It’s quick to whip up, requiring just a few simple steps. The taste? Oh, it’s a delightful blend of fruity and sweet that dances on your palate. Plus, the vibrant colors and sprinkles make it a hit with kids and adults alike. It’s the perfect treat to brighten any day!
Ingredients for Dragonfruit Bubblegum Blast Ice Cream
Let’s gather our magical ingredients for this Dragonfruit Bubblegum Blast Ice Cream! Each one plays a vital role in creating that creamy, dreamy texture and flavor.
- Heavy cream: This is the base of our ice cream, giving it that rich, velvety texture.
- Whole milk: It adds creaminess while balancing the richness of the heavy cream.
- Granulated sugar: Sweetness is key! It enhances the flavors and helps achieve that perfect scoopable texture.
- Vanilla extract: A classic flavor that rounds out the sweetness and adds depth.
- Bubblegum extract: This is where the fun begins! It gives our ice cream that nostalgic bubblegum flavor. Adjust it to your taste for a sweeter or subtler kick.
- Dragonfruit purée: The star of the show! This vibrant fruit adds a beautiful pink hue and a refreshing taste. You can use fresh or frozen dragonfruit, just blend it smooth.
- Pink food coloring: Optional, but a few drops can brighten up the pink color, making it even more eye-catching.
- Purple or blue food coloring: Also optional, this creates those fun bubblegum streaks that make the ice cream visually appealing.
- Rainbow sprinkles: These little gems add a pop of color and a delightful crunch. Use jimmies style to prevent bleeding into the ice cream.
For exact measurements, check the bottom of the article where you can find everything listed for easy printing. Now, let’s get ready to create this colorful treat!
How to Make Dragonfruit Bubblegum Blast Ice Cream
Now that we have our ingredients ready, let’s dive into the fun part: making the Dragonfruit Bubblegum Blast Ice Cream! Follow these simple steps, and you’ll be on your way to a delightful treat that’s sure to impress.
Step 1: Whisk the Base
In a large bowl, combine the cold heavy cream, whole milk, granulated sugar, vanilla extract, and bubblegum extract. Whisk everything together until the sugar dissolves completely. This creamy base is the heart of our ice cream, so make sure it’s well mixed!
Step 2: Chill the Mixture
Cover the bowl with plastic wrap and pop it in the refrigerator for at least 2 to 3 hours. This step is crucial! Chilling the mixture ensures that it’s super cold when it hits the ice cream maker, leading to a smoother texture.
Step 3: Churn the Ice Cream
Once your mixture is chilled, pour it into your ice cream maker. Churn according to the manufacturer’s instructions, usually about 20 to 25 minutes. You’ll see it transform into a fluffy, soft-serve consistency. It’s like watching magic happen right in your kitchen!
Step 4: Add Dragonfruit Purée
Now comes the fun part! Gently fold in the dragonfruit purée. This will create beautiful pink streaks throughout the ice cream. Don’t overmix; we want those vibrant swirls to shine through!
Step 5: Swirl in Food Coloring
If you’re feeling adventurous, add a few drops of purple or blue food coloring. Lightly swirl it with a spatula to create those whimsical bubblegum streaks. It’s all about making this ice cream as visually stunning as it is delicious!
Step 6: Fold in Sprinkles
Next, fold in the rainbow sprinkles. These little bursts of color add a delightful crunch and make the ice cream even more fun. Save a few sprinkles for topping later; trust me, it’s worth it!
Step 7: Freeze and Serve
Transfer your ice cream to a freezer-safe container. Top it with the reserved sprinkles for that extra flair. Freeze for at least 4 hours until it’s scoopable. When you’re ready to serve, just scoop, smile, and enjoy your homemade Dragonfruit Bubblegum Blast Ice Cream!
Tips for Success
- Make sure your ice cream maker bowl is completely frozen before churning for the best texture.
- Adjust the bubblegum extract to suit your taste; a little goes a long way!
- For a more vibrant color, don’t hesitate to add extra food coloring.
- Use jimmies-style sprinkles to prevent bleeding into the ice cream.
- Let the ice cream sit at room temperature for a few minutes before scooping for easier serving.
Equipment Needed
- Ice Cream Maker: Essential for churning. If you don’t have one, a sturdy blender can work in a pinch.
- Large Mixing Bowl: For whisking the base. Any large bowl will do!
- Spatula: Perfect for folding in ingredients and swirling colors.
- Freezer-Safe Container: To store your ice cream. A glass or plastic container works great.
Variations
- Fruit Swaps: Try using other fruit purées like mango or strawberry for a different flavor profile.
- Dairy-Free Option: Substitute coconut cream and almond milk for a vegan-friendly version.
- Less Sugar: Use a sugar substitute like stevia or monk fruit for a lower-calorie treat.
- Chocolate Twist: Add chocolate chips or a swirl of chocolate sauce for a decadent touch.
- Nutty Crunch: Fold in crushed nuts like pistachios or almonds for added texture and flavor.
Serving Suggestions
- Pair your Dragonfruit Bubblegum Blast Ice Cream with fresh fruit like strawberries or kiwi for a refreshing contrast.
- Serve it in colorful waffle cones for a fun presentation that kids will love.
- Drizzle with chocolate or caramel sauce for an extra indulgent treat.
- Enjoy it alongside a fizzy soda or a tropical smoothie for a delightful summer vibe.
FAQs about Dragonfruit Bubblegum Blast Ice Cream
Can I make Dragonfruit Bubblegum Blast Ice Cream without an ice cream maker?
Absolutely! If you don’t have an ice cream maker, pour the mixture into a shallow dish and freeze it. Stir every 30 minutes for about 2-3 hours to break up ice crystals. It’s a bit more work, but the result is still delicious!
How long does this ice cream last in the freezer?
Your Dragonfruit Bubblegum Blast Ice Cream can last up to 2 weeks in the freezer. Just make sure it’s stored in an airtight container to keep it fresh and creamy!
Can I use fresh dragonfruit instead of frozen?
Yes, fresh dragonfruit works perfectly! Just blend it until smooth, and you’ll get that vibrant color and refreshing taste. It’s a great way to enjoy the fruit’s natural flavor!
What if I don’t like bubblegum flavor?
No worries! You can easily swap the bubblegum extract for another flavor, like cotton candy or even vanilla. The base recipe remains the same, so feel free to get creative!
Is this ice cream suitable for kids?
Definitely! The Dragonfruit Bubblegum Blast Ice Cream is a fun and colorful treat that kids will love. Just keep an eye on the sugar content if you’re watching their intake!
Final Thoughts
Creating Dragonfruit Bubblegum Blast Ice Cream is more than just making a dessert; it’s about crafting joyful memories in your kitchen. The vibrant colors and playful flavors bring a sense of whimsy that can brighten any day. Whether you’re sharing scoops with friends or enjoying a quiet moment alone, this ice cream is sure to spark smiles and laughter. Plus, the simple steps make it accessible for everyone, even on the busiest days. So, roll up your sleeves, embrace the fun, and let this delightful treat transport you to a world of sweet indulgence!
Print
Dragonfruit Bubblegum Blast Ice Cream Recipe Awaits You!
- Total Time: 4 hours 15 minutes
- Yield: 6 servings 1x
- Diet: Vegetarian
Description
A creamy, colorful swirl of pink dragonfruit and bubblegum flavors, loaded with rainbow sprinkles for a magical treat!
Ingredients
- 2 cups heavy cream (cold)
- 1 cup whole milk
- ¾ cup granulated sugar
- 1 tsp vanilla extract
- ½ tsp bubblegum extract (adjust to taste)
- ½ cup dragonfruit purée (pitaya, fresh or frozen, blended smooth)
- A few drops pink food coloring (optional, for brightness)
- A few drops purple or blue food coloring (optional, for bubblegum streaks)
- ½ cup rainbow sprinkles (jimmies style, to prevent bleeding)
Instructions
- In a large bowl, whisk together heavy cream, milk, sugar, vanilla, and bubblegum extract until sugar dissolves.
- Cover and refrigerate for at least 2–3 hours, or until very cold.
- Pour into an ice cream maker and churn according to manufacturer’s directions (about 20–25 minutes).
- Once churned, gently fold in the dragonfruit purée to create pink streaks.
- Add a few drops of purple/blue food coloring and lightly swirl with a spatula for a bubblegum effect.
- Fold in sprinkles at the end (reserve a little for topping).
- Transfer to a freezer container, top with extra sprinkles, and freeze at least 4 hours until scoopable.
Notes
- Adjust the amount of bubblegum extract to your taste preference.
- For a more vibrant color, add more food coloring as desired.
- Ensure the ice cream maker bowl is fully frozen before churning.
- Prep Time: 15 minutes
- Cook Time: 0 minutes
- Category: Dessert
- Method: Ice Cream Maker
- Cuisine: American
Nutrition
- Serving Size: 1/2 cup
- Calories: 250
- Sugar: 20g
- Sodium: 50mg
- Fat: 15g
- Saturated Fat: 9g
- Unsaturated Fat: 4g
- Trans Fat: 0g
- Carbohydrates: 30g
- Fiber: 1g
- Protein: 3g
- Cholesterol: 60mg


