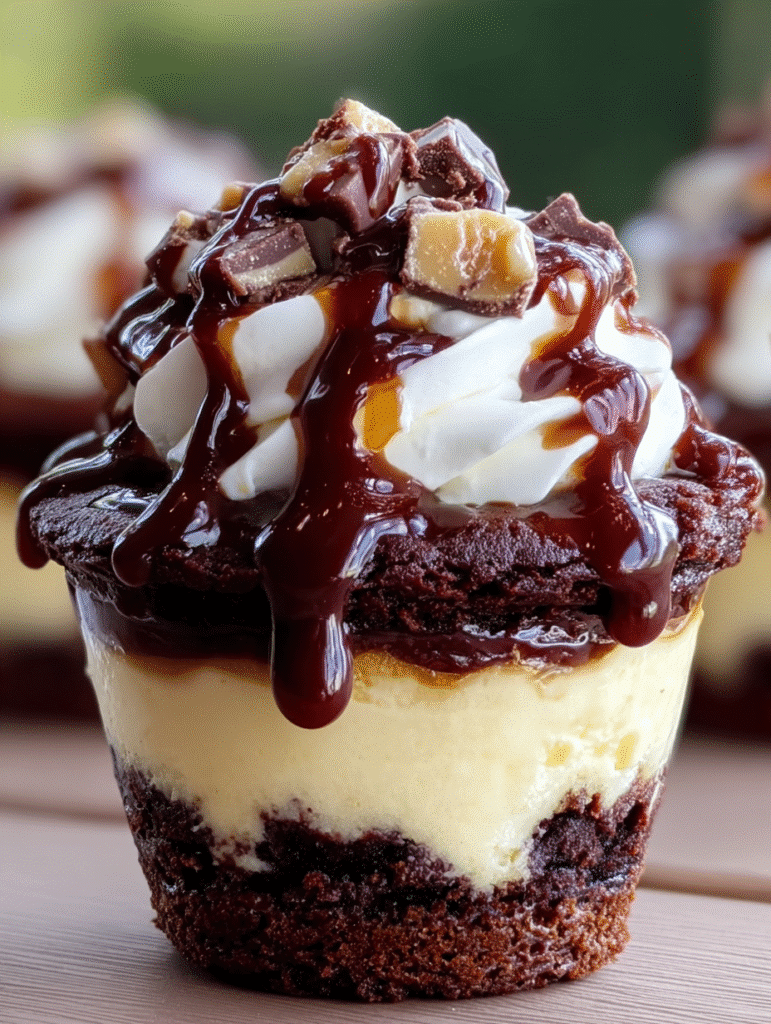
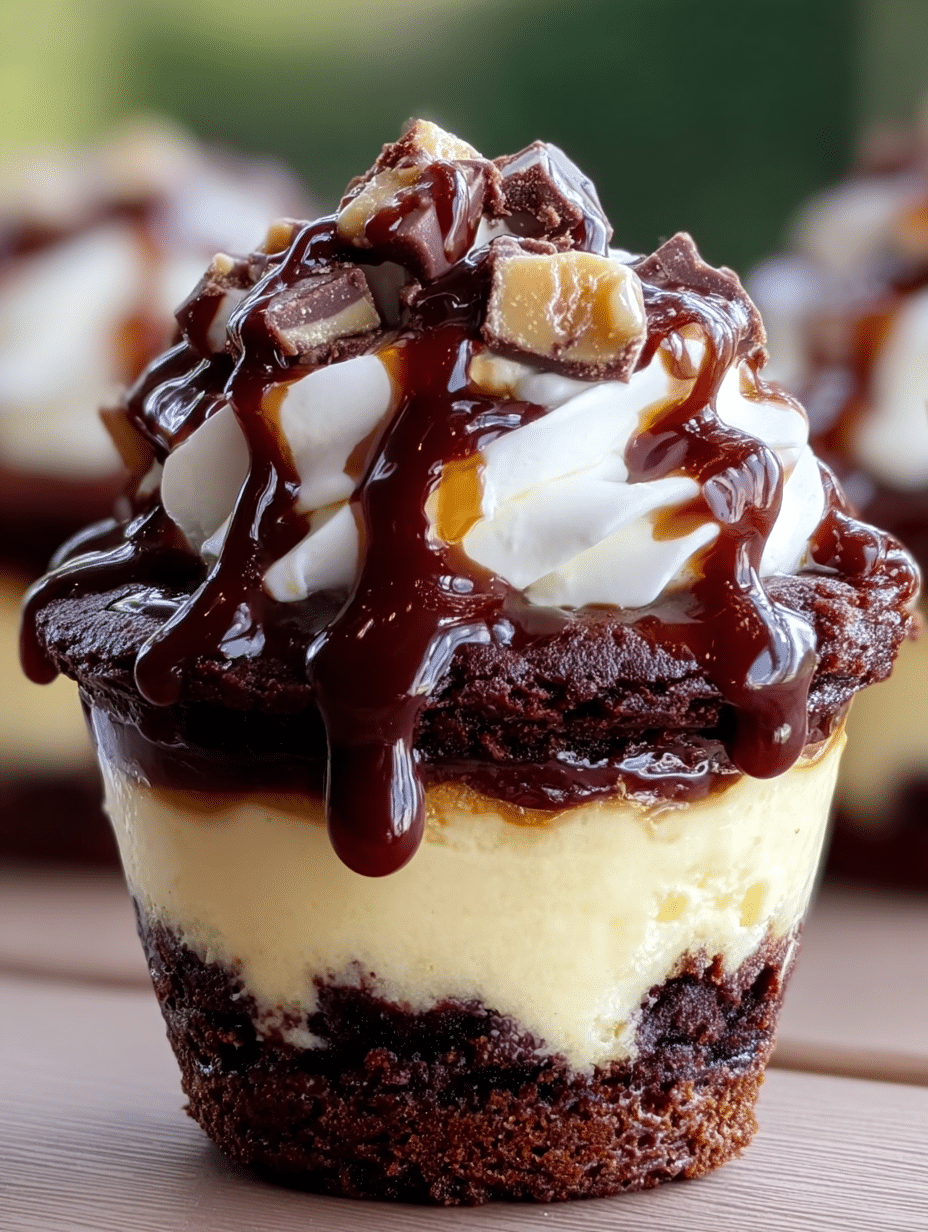
Introduction to Loaded Brownie Cheesecake Cups
Hey there, fellow dessert lovers! If you’re anything like me, you know that sometimes life calls for a little indulgence. That’s where these Loaded Brownie Cheesecake Cups come in! They’re the perfect treat for a busy day or a sweet surprise for your loved ones. Imagine sinking your teeth into a rich brownie base, topped with creamy cheesecake, and drizzled with your favorite sauces. It’s a delightful combination that’s sure to impress. Plus, they’re easy to whip up, making them a go-to recipe for any occasion. Let’s dive into this delicious adventure together!
Why You’ll Love This Loaded Brownie Cheesecake Cups
These Loaded Brownie Cheesecake Cups are a dream come true for any dessert enthusiast! They’re quick to make, taking just 45 minutes from start to finish. The combination of rich brownie and creamy cheesecake is simply irresistible. Plus, you can customize them with your favorite toppings, making each batch uniquely yours. Whether it’s a family gathering or a cozy night in, these cups are sure to bring smiles all around!
Ingredients for Loaded Brownie Cheesecake Cups
Gathering the right ingredients is the first step to creating these delightful Loaded Brownie Cheesecake Cups. Here’s what you’ll need:
- Brownie mix: You can use a box mix for convenience or whip up a homemade version with sugar, butter, eggs, flour, cocoa powder, salt, and vanilla. Both options yield delicious results!
- Cream cheese: This is the star of the cheesecake layer. Make sure it’s softened for easy mixing, giving you that smooth, creamy texture.
- Granulated sugar: A little sweetness goes a long way in balancing the flavors of the cheesecake.
- Egg: This helps bind the cheesecake mixture, giving it that perfect creamy consistency.
- Vanilla extract: A splash of vanilla adds warmth and depth to the cheesecake flavor.
- Whipped cream: Whether homemade or from a can, this fluffy topping is a must for that extra indulgence.
- Caramel sauce: Drizzling this over the top adds a sweet, gooey finish that’s hard to resist.
- Chocolate sauce: Because who doesn’t love a little extra chocolate? It complements the brownie base beautifully.
- Chopped candy bars: Feel free to get creative! Snickers, Reese’s, or any of your favorite treats can be sprinkled on top for added crunch and flavor.
For exact measurements, check the bottom of the article where you can find everything listed for easy printing. Now, let’s get ready to bake these heavenly cups!
How to Make Loaded Brownie Cheesecake Cups
Now that we have our ingredients ready, let’s dive into the fun part—making these Loaded Brownie Cheesecake Cups! Follow these simple steps, and you’ll be on your way to dessert bliss.
Step 1: Preheat the Oven
First things first, preheat your oven to 350°F (175°C). This ensures even baking, so your brownie cheesecake cups come out perfectly every time.
Step 2: Prepare the Muffin Tin
Next, grease a muffin tin well. This step is crucial to prevent sticking. Trust me, you want these delicious cups to come out easily!
Step 3: Make the Brownie Batter
Now, prepare the brownie batter as directed on the box or use the homemade recipe provided earlier. The rich, fudgy base is what makes these Loaded Brownie Cheesecake Cups so special!
Step 4: Fill the Muffin Cups
Fill each muffin cup halfway with brownie batter. This allows enough room for the brownie to rise without overflowing. We want a nice, fluffy texture!
Step 5: Prepare the Cheesecake Mixture
In a bowl, beat the softened cream cheese, granulated sugar, egg, and vanilla extract until smooth. This creamy mixture is the heart of your Loaded Brownie Cheesecake Cups!
Step 6: Assemble the Cups
Spoon 1–2 tablespoons of the cheesecake mixture into the center of each brownie cup. Then, cover it with a little more brownie batter. Just don’t overfill—leave some space for it to rise!
Step 7: Bake
Now, it’s time to bake! Place the muffin tin in the oven and bake for 20–25 minutes. You’ll know they’re done when the centers are just set. A little jiggle is okay!
Step 8: Cool and Decorate
Once baked, allow the cups to cool completely before removing them from the muffin tin. This makes it easier to get them out without breaking. Finally, top with whipped cream, drizzle with caramel and chocolate sauce, and sprinkle your favorite chopped candy bars on top. Enjoy!

Tips for Success
- Don’t overfill the muffin cups; leave room for the brownie to rise.
- Let the cups cool completely before removing them to avoid breakage.
- Use room temperature cream cheese for a smoother cheesecake mixture.
- Experiment with toppings—try crushed cookies or fresh fruit for a twist!
- Store any leftovers in an airtight container in the fridge for up to three days.
Equipment Needed
- Muffin tin: A standard 12-cup muffin tin works best. If you don’t have one, use a silicone mold for easy removal.
- Mixing bowls: A medium bowl for the cheesecake mixture and a larger one for the brownie batter.
- Electric mixer: This makes blending the cheesecake smooth and easy. A whisk can work too, but it’ll take more effort!
- Spatula: A rubber spatula is perfect for scraping down the sides of the bowls.
Variations
- Gluten-Free: Use a gluten-free brownie mix or substitute the flour in the homemade recipe with a gluten-free blend.
- Nutty Delight: Add chopped nuts like walnuts or pecans to the brownie batter for an extra crunch.
- Fruit Infusion: Incorporate fresh berries or banana slices into the cheesecake layer for a fruity twist.
- Vegan Option: Substitute eggs with flax eggs and use dairy-free cream cheese for a plant-based version.
- Minty Fresh: Add a few drops of peppermint extract to the cheesecake mixture for a refreshing mint flavor.
Serving Suggestions
- Pair these Loaded Brownie Cheesecake Cups with a scoop of vanilla ice cream for an extra indulgent treat.
- Serve with a side of fresh berries to add a pop of color and freshness.
- For drinks, a rich coffee or a glass of cold milk complements the sweetness perfectly.
- Present them on a decorative platter, drizzled with extra caramel and chocolate sauce for a stunning display.
FAQs about Loaded Brownie Cheesecake Cups
As I’ve shared my love for these Loaded Brownie Cheesecake Cups, I know you might have a few questions. Here are some common queries that can help you on your baking journey!
Can I use a different type of brownie mix?
Absolutely! You can use any brownie mix you love, whether it’s fudge, chocolate chip, or even a gluten-free option. The key is to choose one that you enjoy!
How do I store leftover Loaded Brownie Cheesecake Cups?
Store any leftovers in an airtight container in the fridge. They’ll stay fresh for up to three days, but I doubt they’ll last that long!
Can I make these cups ahead of time?
Yes! You can prepare the brownie and cheesecake layers in advance. Just assemble and bake them when you’re ready to serve. They’re perfect for parties!
What toppings can I use for my Loaded Brownie Cheesecake Cups?
The sky’s the limit! You can use whipped cream, caramel sauce, chocolate sauce, or even crushed cookies. Get creative and make them your own!
Can I freeze these Loaded Brownie Cheesecake Cups?
Yes, you can freeze them! Just make sure they’re completely cooled, then wrap them tightly in plastic wrap. They’ll be good for up to a month. Just thaw before serving!
Final Thoughts
Creating these Loaded Brownie Cheesecake Cups is more than just baking; it’s about sharing joy and indulgence with those you love. Each bite is a delightful dance of flavors, combining rich brownie and creamy cheesecake that brings smiles to faces. Whether you’re celebrating a special occasion or simply treating yourself, these cups are sure to elevate any moment. Plus, the customization options mean you can make them uniquely yours. So, roll up your sleeves, gather your ingredients, and let the sweet magic unfold in your kitchen. Trust me, you won’t regret it!
PrintLoaded Brownie Cheesecake Cups: Indulge in this Delight!
- Total Time: 45 minutes
- Yield: 12 cups 1x
- Diet: Vegetarian
Description
Indulge in these delicious Loaded Brownie Cheesecake Cups, featuring a rich brownie base topped with a creamy cheesecake layer and finished with your favorite toppings.
Ingredients
- 1 box brownie mix (plus ingredients listed on box) or homemade: 1 cup sugar, ½ cup butter, 2 eggs, ½ cup flour, ⅓ cup cocoa powder, pinch salt, ½ tsp vanilla
- 225 g (8 oz) cream cheese, softened
- ¼ cup granulated sugar
- 1 large egg
- 1 tsp vanilla extract
- Whipped cream (homemade or canned)
- Caramel sauce
- Chocolate sauce
- Chopped Snickers or your favorite candy bars
Instructions
- Preheat oven to 175°C (350°F).
- Grease a muffin tin well.
- Prepare brownie batter as directed.
- Fill each muffin cup halfway with brownie batter.
- In a bowl, beat cream cheese, sugar, egg, and vanilla until smooth.
- Spoon 1–2 tbsp of cheesecake mixture into the center of each brownie cup.
- Spoon a little more brownie batter on top to cover cheesecake (not too much, leave space for it to rise).
- Bake for 20–25 minutes, until centers are just set.
- Allow to cool completely before removing from muffin tin.
- Pipe or spoon whipped cream on top.
- Drizzle generously with caramel and chocolate sauce.
- Sprinkle chopped candy bars over the top.
Notes
- Ensure the brownie batter is not overfilled to allow for rising.
- Let the cups cool completely for easier removal from the muffin tin.
- Feel free to customize toppings based on your preferences.
- Prep Time: 20 minutes
- Cook Time: 25 minutes
- Category: Dessert
- Method: Baking
- Cuisine: American
Nutrition
- Serving Size: 1 cup
- Calories: 250
- Sugar: 20g
- Sodium: 150mg
- Fat: 12g
- Saturated Fat: 7g
- Unsaturated Fat: 3g
- Trans Fat: 0g
- Carbohydrates: 30g
- Fiber: 1g
- Protein: 3g
- Cholesterol: 50mg


