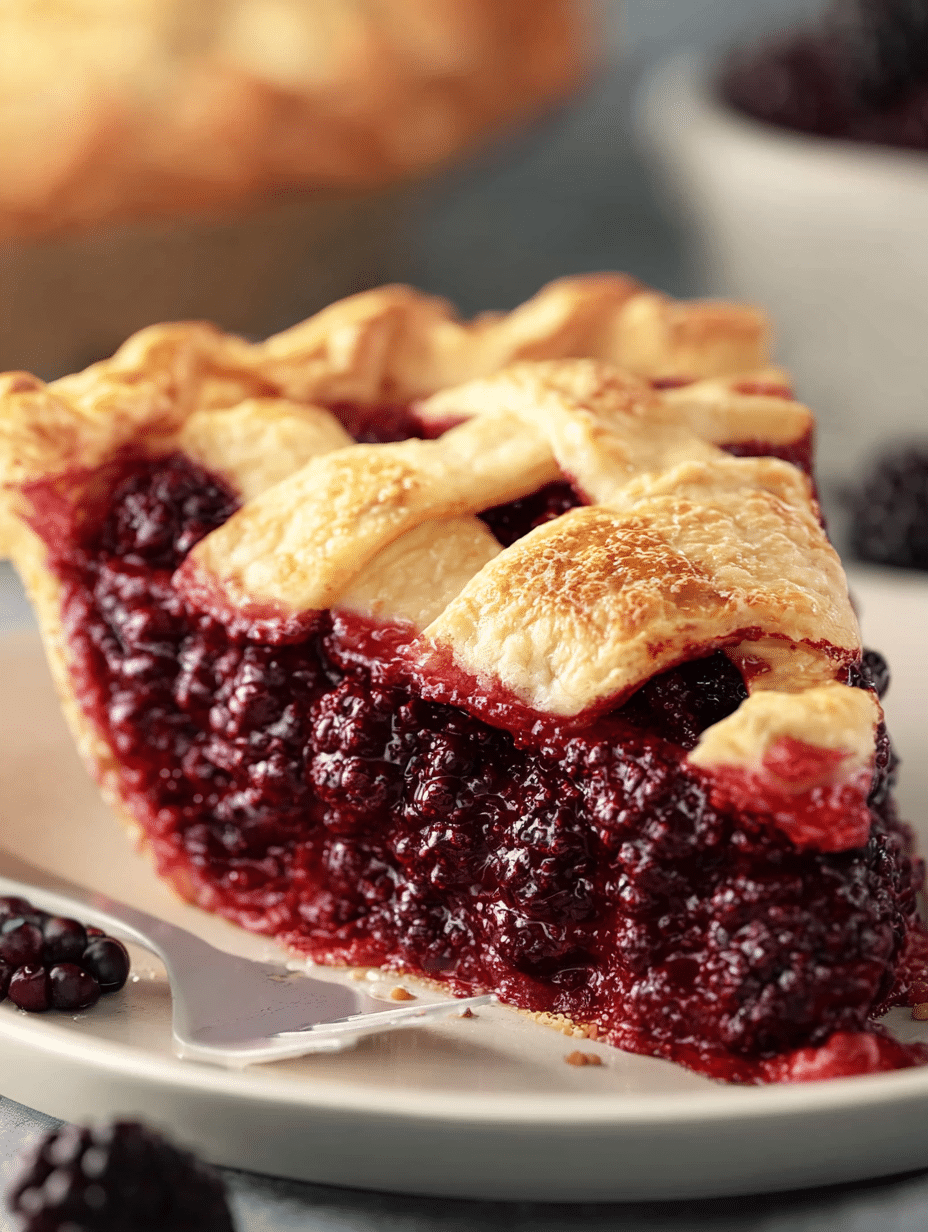
Introduction to Oregon’s Marionberry Pie
There’s something magical about a slice of Oregon’s Marionberry Pie that brings back memories of summer picnics and family gatherings. The sweet, tangy filling paired with a flaky crust is like a warm hug on a plate. Whether you’re looking to impress guests or simply treat yourself after a long day, this pie is the perfect solution. It’s not just a dessert; it’s a celebration of flavors that can brighten any occasion. Trust me, once you take that first bite, you’ll understand why this pie holds a special place in my heart.
Why You’ll Love This Oregon’s Marionberry Pie
This Oregon’s Marionberry Pie is a delightful blend of simplicity and flavor. It’s easy to whip up, making it perfect for both novice bakers and seasoned pros. The vibrant marionberries burst with sweetness, creating a taste that dances on your palate. Plus, the flaky crust is a dream come true! Whether you’re serving it at a gathering or enjoying a quiet evening at home, this pie is sure to bring smiles all around.
Ingredients for Oregon’s Marionberry Pie
Gathering the right ingredients is the first step to creating a delicious Oregon’s Marionberry Pie. Here’s what you’ll need:
- All-purpose flour: This is the backbone of your pie crust, providing structure and flakiness.
- Salt: A pinch enhances the flavors, balancing the sweetness of the filling.
- Sugar: This sweetener is essential for both the crust and the filling, adding that delightful touch.
- Unsalted butter: Cold butter is key for a flaky crust. It creates those lovely layers as it melts during baking.
- Ice water: This helps bind the dough without warming the butter, ensuring a tender crust.
- Fresh or frozen marionberries: The star of the show! If marionberries are hard to find, blackberries make a great substitute.
- Granulated sugar: This sweetens the berry filling, allowing the natural tartness to shine through.
- Cornstarch: This thickens the filling, giving it that perfect, gooey texture. You can swap it for flour if you prefer a thicker filling.
- Lemon juice and zest: These add a bright, zesty flavor that complements the berries beautifully.
- Vanilla extract: A splash of vanilla rounds out the flavors, making the pie even more irresistible.
- Butter (for dotting): A few small cubes of butter on top of the filling add richness as it bakes.
- Egg (for egg wash): This gives the crust a beautiful golden color and a lovely sheen.
- Coarse sugar: Sprinkling this on top before baking adds a delightful crunch and sweetness.
For exact measurements, check the bottom of the article where you can find everything listed for easy printing. Happy baking!
How to Make Oregon’s Marionberry Pie
Prepare the Pie Crust
To create the perfect pie crust for Oregon’s Marionberry Pie, start by whisking together the flour, salt, and sugar in a large bowl. Next, cut in the cold butter using a pastry cutter or your fingers until the mixture resembles coarse crumbs. This step is crucial; cold butter is your secret weapon for a flaky crust. Gradually add ice water, mixing just until the dough holds together. Don’t overwork it! Once combined, divide the dough into two discs, wrap them in plastic, and refrigerate for at least an hour. This chilling time helps the butter firm up, ensuring a tender crust.
Make the Marionberry Filling
Now, let’s move on to the star of the show: the marionberry filling! In a large bowl, combine the fresh or frozen marionberries with granulated sugar, cornstarch, lemon juice, lemon zest, and vanilla extract. Gently stir to coat the berries, allowing their natural juices to mingle with the sugar and lemon. Let this mixture sit for about 10 to 15 minutes. This resting time is essential; it allows the flavors to deepen and the cornstarch to start thickening the filling, creating that luscious texture we all crave in a pie.
Assemble the Pie
Once your crust and filling are ready, it’s time to assemble the pie! Roll out one disc of dough on a floured surface until it’s about 1/8 inch thick. Carefully fit it into a 9-inch pie dish, ensuring there are no tears. Pour the marionberry filling into the crust, dotting it with small cubes of butter for extra richness. Roll out the second disc and cut it into strips for a beautiful lattice top, or simply place it whole and cut slits for ventilation. Seal the edges by crimping them decoratively, and brush the crust with a beaten egg for that golden finish.
Bake the Pie
Now, it’s time to bake your masterpiece! Preheat your oven to 400°F (200°C). Place the pie in the oven and bake for 20 minutes. Then, reduce the temperature to 350°F (175°C) and continue baking for an additional 30 to 40 minutes. Keep an eye on the crust; if it starts to brown too quickly, cover the edges with foil. You’ll know it’s done when the filling is bubbly and the crust is a beautiful golden brown. Allow the pie to cool for at least 2 hours before slicing. This cooling time helps the filling set perfectly!
Tips for Success
- Use cold ingredients for the crust; it makes all the difference in flakiness.
- Don’t skip the chilling time for the dough; it helps prevent shrinkage.
- Let the filling sit to enhance flavors and achieve the right consistency.
- Keep an eye on the pie while baking to avoid over-browning.
- Serve with a scoop of vanilla ice cream for a delightful treat!
Equipment Needed
- 9-inch pie dish: A classic choice, but a tart pan works too!
- Pastry cutter: Great for cutting in butter, but your fingers will do just fine.
- Rolling pin: Essential for rolling out dough; a wine bottle can work in a pinch!
- Mixing bowls: Use any size you have on hand for mixing ingredients.
- Measuring cups and spoons: Accurate measurements are key, but eyeballing can be fun too!
Variations
- Berry Blend: Mix marionberries with raspberries or blueberries for a delightful twist on flavor.
- Gluten-Free Crust: Substitute all-purpose flour with a gluten-free blend for a delicious gluten-free option.
- Vegan Version: Use coconut oil instead of butter and a flax egg for the egg wash to make it vegan-friendly.
- Spiced Filling: Add a pinch of cinnamon or nutmeg to the filling for a warm, cozy flavor.
- Chocolate Drizzle: Drizzle melted dark chocolate over the pie before serving for an indulgent touch.
Serving Suggestions
- Serve warm with a scoop of vanilla ice cream for a classic pairing.
- Top with freshly whipped cream for an extra indulgent treat.
- Pair with a cup of hot coffee or tea for a cozy afternoon.
- Garnish with fresh mint leaves for a pop of color.
- Present on a rustic wooden board for a charming display.
FAQs about Oregon’s Marionberry Pie
Can I use frozen marionberries for this pie?
Absolutely! Frozen marionberries work wonderfully in Oregon’s Marionberry Pie. Just make sure to thaw and drain any excess liquid before mixing them with the other ingredients. This will help maintain the perfect filling consistency.
What’s the best way to store leftover pie?
To keep your pie fresh, store it in the refrigerator, covered loosely with plastic wrap or aluminum foil. It should last for about 3 to 4 days. Just remember to reheat it slightly before serving for that fresh-baked taste!
Can I make the pie crust ahead of time?
Yes! You can prepare the pie crust in advance. Just wrap the discs tightly in plastic wrap and store them in the refrigerator for up to 2 days or freeze them for up to a month. Thaw in the fridge before using.
What can I substitute for marionberries?
If you can’t find marionberries, blackberries are a fantastic substitute. You can also mix in some raspberries for a delightful flavor twist in your Oregon’s Marionberry Pie!
How do I know when the pie is done baking?
Your pie is ready when the filling is bubbly and the crust is golden brown. If you notice the edges browning too quickly, cover them with foil to prevent burning. Let it cool for at least 2 hours before slicing to ensure the filling sets properly.
Final Thoughts
Baking Oregon’s Marionberry Pie is more than just a recipe; it’s an experience filled with joy and nostalgia. The aroma wafting through your kitchen as it bakes is like a warm invitation to gather around the table. Each slice tells a story, whether it’s a family tradition or a new memory in the making. Sharing this pie with loved ones creates moments that linger long after the last bite. So, roll up your sleeves, embrace the process, and let the magic of marionberries transform your day. Trust me, this pie will become a cherished favorite in your home!
Print
Oregon’s Marionberry Pie: Discover the Perfect Recipe!
- Total Time: 2 hours
- Yield: 8 servings 1x
- Diet: Vegetarian
Description
A delicious and classic Oregon’s Marionberry Pie recipe featuring a flaky crust and a sweet, tangy filling made from fresh marionberries.
Ingredients
- 2 ½ cups all-purpose flour
- 1 tsp salt
- 1 tsp sugar
- 1 cup unsalted butter (cold, cut into cubes)
- 6–8 tbsp ice water
- 5 cups fresh or frozen marionberries (or blackberries if unavailable)
- 1 cup granulated sugar
- ¼ cup cornstarch (or ⅓ cup flour for thicker filling)
- 1 tbsp lemon juice
- 1 tsp lemon zest
- 1 tsp vanilla extract
- 1 tbsp butter, cut into small cubes
- 1 egg (beaten, for egg wash)
- 1 tbsp coarse sugar (for sprinkling)
Instructions
- In a large bowl, whisk flour, salt, and sugar.
- Cut in butter with a pastry cutter until mixture resembles coarse crumbs.
- Gradually add ice water, mixing just until dough holds together.
- Divide into 2 discs, wrap in plastic, and refrigerate for at least 1 hour.
- In a large bowl, combine marionberries, sugar, cornstarch, lemon juice, lemon zest, and vanilla.
- Stir gently to coat and let sit for 10–15 minutes.
- Preheat oven to 200°C (400°F).
- Roll out one disc of dough and fit into a 9-inch pie dish.
- Pour berry mixture into crust and dot with butter.
- Roll out second disc and cut into strips for a lattice top (or place whole and cut slits).
- Seal edges and crimp decoratively.
- Brush crust with beaten egg and sprinkle with coarse sugar.
- Bake at 200°C (400°F) for 20 minutes, then reduce heat to 175°C (350°F) and bake an additional 30–40 minutes until filling is bubbly and crust is golden.
- If crust browns too quickly, cover edges with foil.
- Allow pie to cool at least 2 hours before slicing to let filling set.
- Serve warm or at room temperature with vanilla ice cream or whipped cream.
Notes
- For a thicker filling, use ⅓ cup of flour instead of cornstarch.
- Make sure the butter is cold for a flaky crust.
- Let the pie cool completely to ensure the filling sets properly.
- Prep Time: 1 hour
- Cook Time: 1 hour
- Category: Dessert
- Method: Baking
- Cuisine: American
Nutrition
- Serving Size: 1 slice
- Calories: 350
- Sugar: 20g
- Sodium: 150mg
- Fat: 18g
- Saturated Fat: 10g
- Unsaturated Fat: 8g
- Trans Fat: 0g
- Carbohydrates: 45g
- Fiber: 3g
- Protein: 3g
- Cholesterol: 40mg


