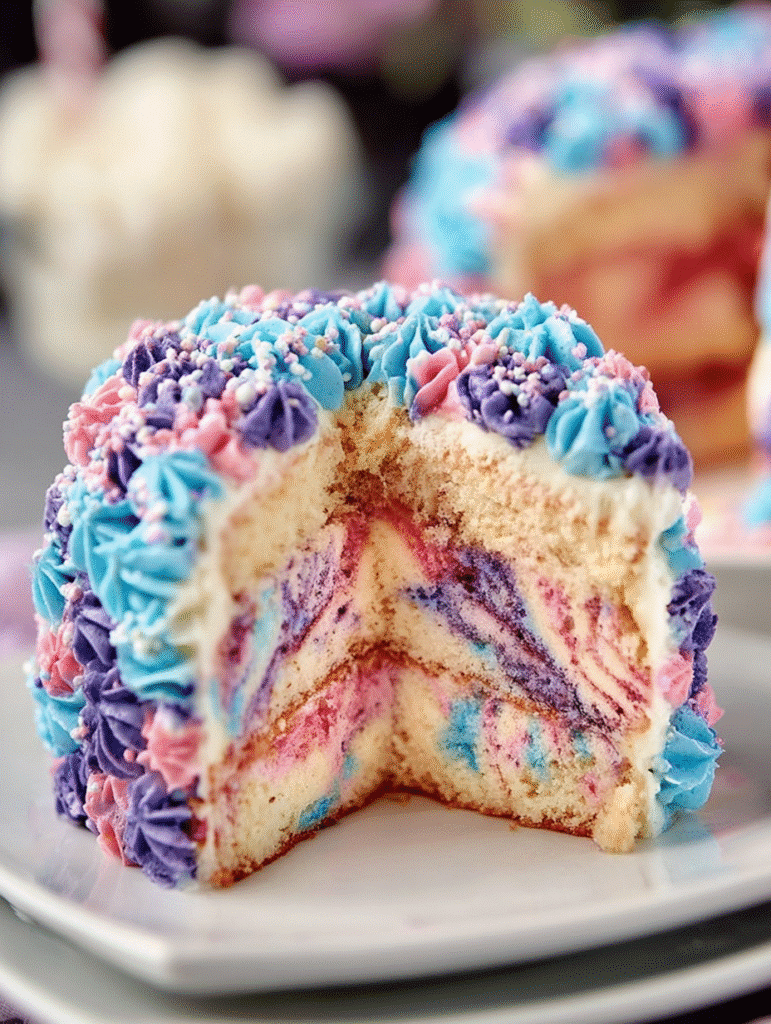
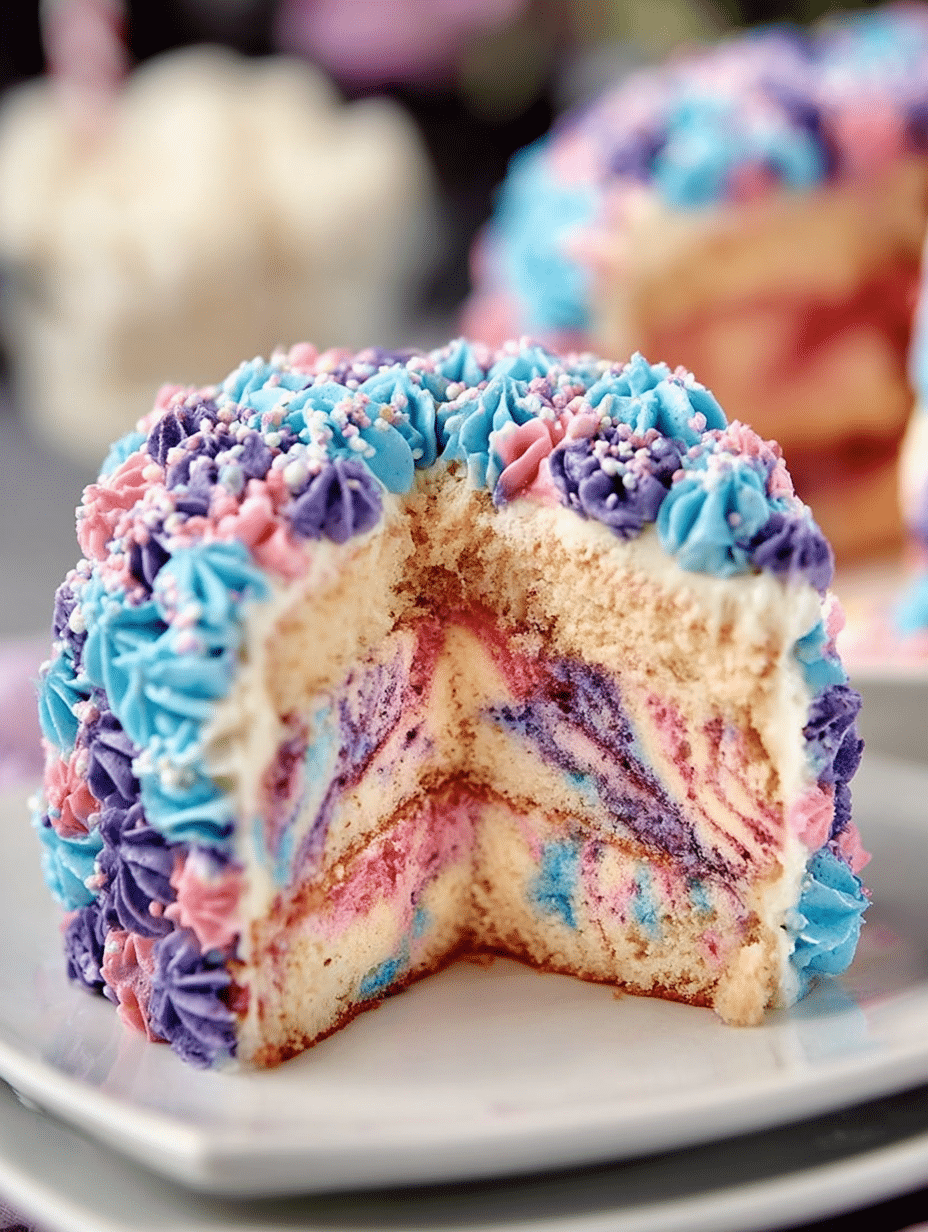
Introduction to Pastel Hydrangea Cake
Welcome to the delightful world of baking! Today, I’m excited to share my recipe for a stunning Pastel Hydrangea Cake. This cake isn’t just a treat for the taste buds; it’s a feast for the eyes too! Imagine a cake that looks like a blooming garden, perfect for any celebration. Whether you’re hosting a birthday party or simply want to brighten up a weekday dinner, this cake is your go-to. It’s surprisingly easy to make, and I promise it will impress your loved ones. Let’s dive into this colorful adventure together!
Why You’ll Love This Pastel Hydrangea Cake
This Pastel Hydrangea Cake is a true showstopper! Not only does it look gorgeous, but it’s also incredibly easy to whip up. With simple ingredients and straightforward steps, even novice bakers can create this masterpiece. Plus, the delightful flavors and vibrant colors will have everyone asking for seconds. It’s the perfect way to bring joy to any gathering, making it a must-try for your next celebration!
Ingredients for Pastel Hydrangea Cake
Gathering the right ingredients is the first step to creating your beautiful Pastel Hydrangea Cake. Here’s what you’ll need:
- Flour: The backbone of your cake, providing structure and texture.
- Sugar: Sweetens the cake and helps create that lovely golden crust.
- Butter: Adds richness and moisture; make sure it’s softened for easy mixing.
- Eggs: They bind everything together and add a lovely fluffiness.
- Milk: Keeps the batter moist and contributes to a tender crumb.
- Baking Powder: The leavening agent that helps your cake rise beautifully.
- Vanilla Extract: A splash of flavor that enhances the sweetness of the cake.
- Food Coloring: Gel colors in pink, blue, and violet will give your cake that stunning hydrangea effect.
- Butter (for Buttercream): More butter, but this time for a creamy, dreamy frosting.
- Powdered Sugar: Sweetens the buttercream and gives it that smooth texture.
- Additional Milk: Just a bit to achieve the perfect consistency for your frosting.
For those who want to experiment, consider adding a hint of almond extract for a unique twist. You can also substitute the milk with a non-dairy alternative if needed. Remember, the exact quantities are listed at the bottom of the article for easy printing!
How to Make Pastel Hydrangea Cake
Now that we have our ingredients ready, let’s get baking! Follow these simple steps to create your stunning Pastel Hydrangea Cake. I promise, it’s easier than it looks!
Step 1: Preheat the Oven
First things first, preheat your oven to 180°C (350°F). Preheating is crucial because it ensures your cake bakes evenly. A hot oven helps the cake rise beautifully, giving it that perfect fluffy texture. Trust me, you don’t want to skip this step!
Step 2: Cream Butter and Sugar
In a large mixing bowl, cream together the softened butter and sugar until the mixture is light and fluffy. This usually takes about 3-5 minutes. The goal is to incorporate air into the butter, which will help your cake rise. If it feels like a workout, you’re doing it right!
Step 3: Add Eggs and Vanilla
Next, add the eggs one at a time, mixing well after each addition. This step is important because it allows each egg to fully incorporate into the batter, creating a smooth texture. Don’t forget to add the vanilla extract for that lovely flavor boost!
Step 4: Combine Dry Ingredients
In a separate bowl, whisk together the flour and baking powder. This helps to evenly distribute the baking powder throughout the flour. Gradually add this dry mixture to your wet ingredients, alternating with the milk. Start and end with the flour mixture. This method keeps the batter smooth and prevents lumps.
Step 5: Color the Batter
Now comes the fun part! Divide the batter into three bowls. Add a few drops of gel food coloring to each bowl—pink, blue, and violet. Mix gently until you achieve your desired shades. Remember, a little goes a long way, so start with small amounts!
Step 6: Bake the Cake
Pour the colored batter into your prepared cake pan, alternating the colors for a marbled effect. Bake in the preheated oven for 30 to 35 minutes. To check for doneness, insert a toothpick into the center. If it comes out clean, your cake is ready!
Step 7: Make the Buttercream
While the cake cools, let’s whip up the buttercream. In a clean bowl, beat the softened butter until it’s pale and creamy. Gradually add the powdered sugar, mixing until smooth. This will create a luscious frosting that’s perfect for decorating!
Step 8: Color the Buttercream
Just like the batter, divide the buttercream into three bowls and color them with the same gel food colors. Mix until you have vibrant shades that match your cake. This will make your hydrangea flowers pop!
Step 9: Assemble the Cake
Once the cake is completely cool, it’s time to assemble. Place one layer on a serving plate and spread a thin layer of buttercream on top. Add the second layer and repeat. Finish with the final layer on top, and cover the entire cake with a smooth layer of buttercream.
Step 10: Decorate with Flowers
Using a star tip, fill piping bags with each color of buttercream. Pipe small flowers all over the top and sides of the cake to mimic the look of hydrangeas. Don’t forget to sprinkle some edible sugar pearls for that magical touch!

Tips for Success
- Make sure your butter is at room temperature for easy mixing.
- Use gel food coloring for vibrant, long-lasting colors.
- Check your cake for doneness a few minutes before the timer goes off.
- Let the cake cool completely before frosting to prevent melting.
- Practice piping on parchment paper before decorating the cake.
Equipment Needed
- Mixing Bowls: Use any size, but a large one is best for mixing batter.
- Electric Mixer: A hand mixer works well, but a stand mixer is a great alternative.
- Measuring Cups and Spoons: Essential for accuracy; you can use a kitchen scale if preferred.
- Cake Pan: A round 9-inch pan is ideal, but any similar size will do.
- Piping Bags and Tips: If you don’t have these, a zip-top bag with a corner cut works too!
Variations of Pastel Hydrangea Cake
- Chocolate Hydrangea Cake: Substitute half of the flour with cocoa powder for a rich chocolate flavor.
- Gluten-Free Option: Use a gluten-free flour blend to make this cake suitable for those with gluten sensitivities.
- Fruit-Infused Cake: Add pureed fruits like strawberries or blueberries to the batter for a fruity twist.
- Vegan Version: Replace eggs with flaxseed meal and use plant-based butter and milk for a vegan-friendly cake.
- Almond Flavor: Swap vanilla extract for almond extract to give your cake a delightful nutty flavor.
Serving Suggestions
- Pair your Pastel Hydrangea Cake with a scoop of vanilla ice cream for a delightful contrast.
- Serve with fresh berries on the side for a burst of flavor and color.
- For drinks, consider a light herbal tea or sparkling lemonade to complement the sweetness.
- Present the cake on a decorative cake stand for an elegant touch.
FAQs about Pastel Hydrangea Cake
Can I make the Pastel Hydrangea Cake ahead of time?
Absolutely! You can bake the cake a day in advance. Just make sure to wrap it tightly in plastic wrap and store it in the fridge. Frost it the day you plan to serve it for the best results.
What if I don’t have gel food coloring?
If gel food coloring isn’t available, you can use liquid food coloring, but keep in mind that it may not produce as vibrant colors. You might need to use more, so start with a few drops and adjust as needed.
How do I store leftover Pastel Hydrangea Cake?
Store any leftover cake in an airtight container in the fridge. It should stay fresh for about 3-4 days. Just remember to let it come to room temperature before serving for the best flavor!
Can I use a different frosting for the cake?
Of course! While the buttercream is delicious, you can use cream cheese frosting or whipped cream for a lighter option. Just make sure it complements the flavors of your cake!
Is this cake suitable for special dietary needs?
Yes! You can easily adapt the Pastel Hydrangea Cake for various dietary needs. Check out the variations section for gluten-free, vegan, and other options to suit your guests!
Final Thoughts
Baking this Pastel Hydrangea Cake is more than just a culinary task; it’s a joyful experience that brings people together. The vibrant colors and delightful flavors create a sense of celebration, whether it’s a birthday, an anniversary, or just a sunny afternoon. I love how this cake can brighten up any gathering, making it a centerpiece of joy and laughter. Plus, the smiles on my loved ones’ faces when they take that first bite? Absolutely priceless! So, roll up your sleeves, gather your ingredients, and let’s create some sweet memories together with this beautiful cake!
Print
Pastel Hydrangea Cake: Discover the Secret Recipe Now!
- Total Time: 1 heure 5 minutes
- Yield: 8–10 portions 1x
- Diet: Vegetarian
Description
A beautiful and colorful Pastel Hydrangea Cake that mimics the look of blooming hydrangeas, perfect for any celebration.
Ingredients
- 300 g de farine
- 200 g de sucre
- 125 g de beurre doux, ramolli
- 3 œufs
- 180 ml de lait
- 1 sachet de levure chimique (10 g)
- 1 c. à café d’extrait de vanille
- Colorants alimentaires en gel (rose, bleu, violet)
- 250 g de beurre doux, ramolli (pour la crème au beurre)
- 500 g de sucre glace, tamisé
- 2 à 3 c. à soupe de lait (pour la crème au beurre)
- 1 c. à café d’extrait de vanille (pour la crème au beurre)
- Colorants alimentaires en gel (rose, bleu, violet) (pour la crème au beurre)
Instructions
- Préchauffer le four à 180°C.
- Battre le beurre et le sucre jusqu’à obtenir une crème légère.
- Ajouter les œufs un à un, puis incorporer la vanille.
- Mélanger la farine avec la levure et incorporer au mélange en alternant avec le lait.
- Diviser la pâte en 3 bols. Ajouter quelques gouttes de colorant dans chaque (rose, bleu, violet).
- Verser en alternance chaque couleur dans le moule (pour un effet marbré).
- Cuire 30 à 35 min. Laisser refroidir avant de garnir.
- Fouetter le beurre ramolli jusqu’à ce qu’il soit pâle et crémeux pour la crème au beurre.
- Ajouter progressivement le sucre glace.
- Ajouter la vanille et le lait pour une texture onctueuse.
- Diviser la crème en 3 bols et colorer en rose, bleu et violet.
- Tartiner une fine couche de crème entre les couches de gâteau.
- Remplir 3 poches à douille (avec embout étoile) de chaque couleur.
- Alterner les couleurs en petites fleurs sur le dessus et les côtés du gâteau pour imiter des hortensias fleuris.
- Parsemer de perles en sucre pour un effet féérique.
Notes
- Assurez-vous que le beurre est bien ramolli pour un mélange homogène.
- Utilisez des colorants alimentaires de bonne qualité pour des couleurs vives.
- Le temps de cuisson peut varier selon votre four, vérifiez la cuisson avec un cure-dent.
- Prep Time: 30 minutes
- Cook Time: 35 minutes
- Category: Dessert
- Method: Baking
- Cuisine: French
Nutrition
- Serving Size: 1 slice
- Calories: 350
- Sugar: 40 g
- Sodium: 150 mg
- Fat: 15 g
- Saturated Fat: 9 g
- Unsaturated Fat: 3 g
- Trans Fat: 0 g
- Carbohydrates: 50 g
- Fiber: 1 g
- Protein: 4 g
- Cholesterol: 70 mg


